An anti-static filter cartridge is only as good as its path to earth. The housing may be grounded, the frame may be bonded, and the cable may look fine, but static charge can still sit on the filter media if the cartridge's internal drain path is folded, painted over, or isolated by a gasket. Proper installation starts by treating the cartridge as part of a bonding system, not as a drop-in part that happens to sit inside a grounded box.
On a retrofit at a chemical plant in southern China, a crew found the cabinet bonding was solid. The cartridge cage showed continuity to the housing. The media face, however, read open to earth. The drain wire had been tucked under the gasket during changeout. Repositioning the wire and adding an external tooth washer brought the reading to 0.8 ohm. That small detail mattered more than the cabinet ground.
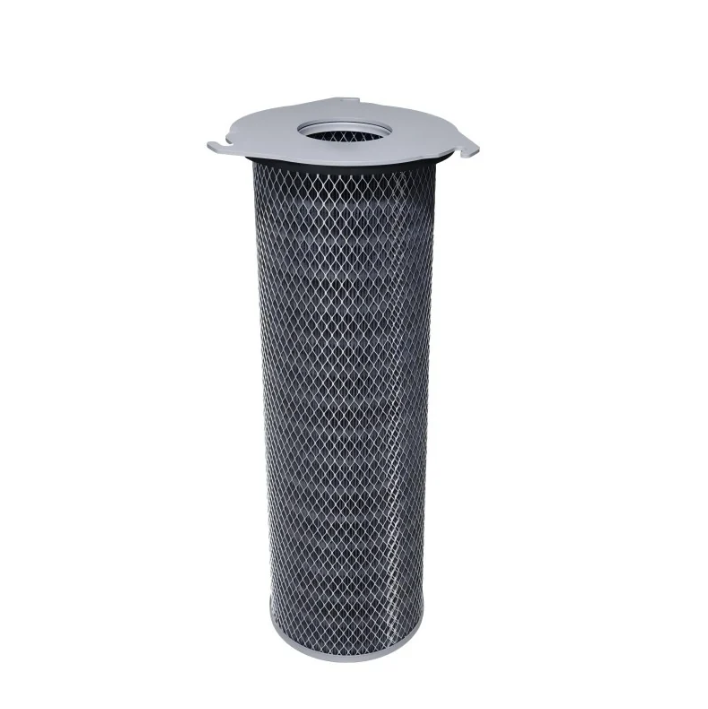
Before installation, trace the intended route from the media to the cage, from the cage to the housing, and from the housing to the plant earth. Mark each connection point. Confirm that the cartridge has a conductive cage, a drain wire or conductive end cap, and a bonding tab that lands on bare metal. If the housing has powder coating, the bond point needs a masked pad or a star washer that bites through the coating. A clamp on painted steel is not a ground connection.
Keep the route short and visible. Long jumper wires add resistance and create places to snag during service. Use listed bonding hardware and a conductor sized for the site's electrical and static requirements. NFPA 77 frames bonding and grounding as a system of conductive paths, so every joint should be checked, not assumed.
The media connection is the one most often missed. Follow the cartridge maker's landing point for the drain wire or conductive end cap. Do not trap the wire under a soft gasket unless the design calls for it. Clean paint, rust, and dust from the landing pad. Tighten the terminal to the maker's torque, then tug the wire gently. A wire that moves under a light pull will move more under vibration.
Next, bond the cage to the housing. If the cartridge seats in a conductive collar, confirm that the collar contacts bare metal. If a gasket isolates the collar, use the dedicated bonding stud. Finally, bond the housing to the plant earth. The ground cable should run to a known earth point, not to a nearby pipe or structural steel unless that point is part of the verified grounding grid.
A visual check is not a resistance check. Use a calibrated meter rated for the expected resistance range. Test from the media face to the cartridge cage, from the cage to the housing, and from the housing to the plant earth. Record the readings before the cartridge is fully seated and after covers and clamps are installed. The second reading catches bonds that open when hardware is tightened.
| Check point | Typical field target | Why it matters |
|---|---|---|
| Media face to cartridge cage | Stable reading, no open circuit, per supplier data | Confirms the drain path is not isolated |
| Cartridge cage to housing | Below 10 ohm, or site bonding spec | Gives static a low-resistance route |
| Housing to plant earth | Per site grounding grid spec | Ties the system to earth |
| Dissipative media surface | 10^4 to 10^9 ohm, per material data | Avoids charge buildup without acting as an insulator |
| Clamp and terminal tug | No movement | Vibration can loosen a good reading |
The table is a field guide, not a universal pass mark. Material data, area classification, and site standards set the final numbers. IEC 60079-0 and related installation codes also call for continuity checks on conductive parts, so the meter reading belongs in the turnover packet.
Several ordinary details can undo a good ground. Powder coating under a bonding stud acts as an insulator. A gasket with no cutout can separate the cage from the housing. A drain wire folded back during cartridge seating can look connected but read open. A star washer installed on the wrong side of a painted flange does nothing. Long wire runs coiled near a service door can flex and break strands.
Service work is another risk. After a cartridge change, the same checks should be repeated. Do not rely on the previous reading. A new gasket, a different cartridge lot, or a rushed seating can change continuity. If the reading drifts, stop and find the joint that changed.
Write down the meter model, calibration date, test points, and readings. Note any masked pads, star washers, or bonding studs used. That record helps the next technician repeat the same route and helps during audits. It also shows whether a reading changed after service.
Renhe supports this kind of practical installation work through manufacturing control, incoming material checks, and supply chain planning that keeps conductive hardware and cartridge details consistent from lot to lot. A grounded anti-static filter cartridge still depends on the installer's hands, but consistent parts make the job easier to repeat.
 Hot News
2026-11-13
2026-11-13
2026-11-13
2026-11-13
2026-11-13
2026-11-12
Renhe focuses on air filter cartridge, gas turbine air filter, Pleated Filter Media, industrial dust, Our main products have been recognized as high-tech products in Jiangsu Province, famous trademarks in Wuxi City, and CE certification.
NO. 31 Xingyuan Road, Jiefang Industrial Park, Gushan Town, Jiangyin City, Jiangsu Province, China (214414)
Copyright © 2024 Jiangsu Renhe Environmental Equipments Co., Ltd Privacy Policy
 EN